Available for Jekyll sites.
Environments allow you to use different values in your website depending on where it is deployed. For example, you could use a different CDN for your development, staging and production sites.
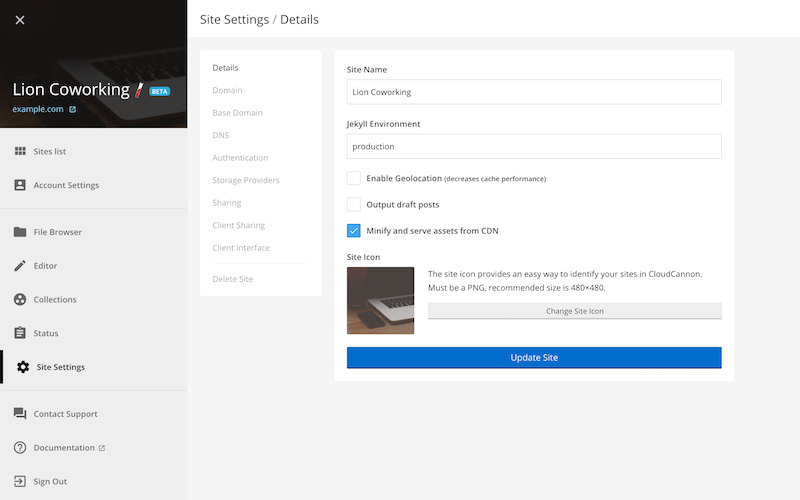
To change the environment for your site:
- Go to the Site Settings / Details section
- Enter your new environment in Jekyll Environment
- Click Update Site
This sets the JEKYLL_ENV environment variable.
CloudCannon defaults to production. Running Jekyll locally defaults to development.
To change the environment on your local machine, set it before running Jekyll:
$ JEKYLL_ENV=production jekyll serveJekyll exposes the environment with jekyll.environment.
You can use this to create separate configurations.
Here’s a short example using variables from _config.yml:
development:
  asset_url: "http://localhost:1337/"
  app_url: "http://localhost:3000/"

staging:
  asset_url: "https://staging.example.org/assets/"
  app_url: "https://staging.example.org/"

production:
  asset_url: "https://cdn.example.org/"
  app_url: "https://app.example.org/"
---
---
<!DOCTYPE html>
<html>
<head>
<title>Environment Test</title>
</head>
<body>
<p>Environment: {{ jekyll.environment }}</p>
<p>Asset URL: {{ site[jekyll.environment].asset_url }}</p>
<p>App URL: {{ site[jekyll.environment].app_url }}</p>
<p>Development Asset URL: {{ site.development.asset_url }}</p>
<p>Production Asset URL: {{ site.production.asset_url }}</p>
<p>Staging Asset URL: {{ site.staging.asset_url }}</p>
<p>Development App URL: {{ site.development.app_url }}</p>
<p>Staging App URL: {{ site.staging.app_url }}</p>
<p>Production App URL: {{ site.production.app_url }}</p>
</body>
</html>