Available with CloudCannon hosting.
Give your live site a professional look with a unique domain name.
To add a custom domain:
- Purchase a domain from a domain registrar (e.g. iwantmyname)
- Go to the Site Settings / Domain section for your site
- Enter your domain with or without a subdomain
- Click Add Domain
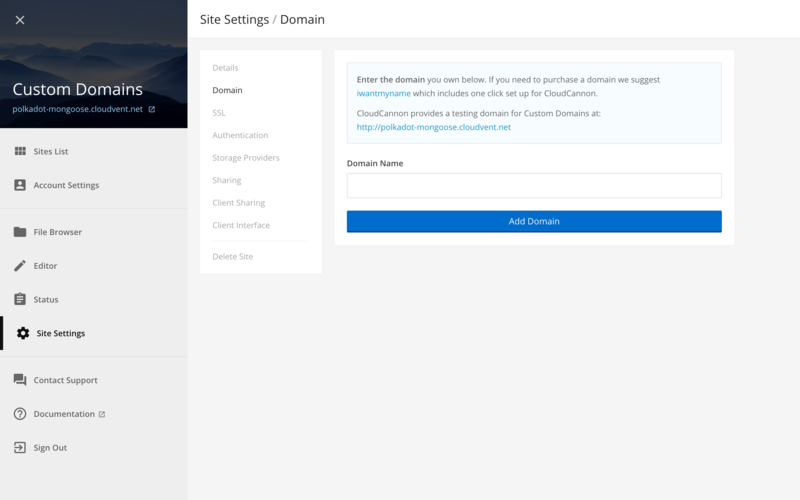
iwantmyname domains have a one click install to simplify configuring your domain.
Configuring your domain
Changes to DNS can take up to 48 hours to propagate, depending on the previous TTL set. Test your site is configured correctly with the pingdom DNS checker.
Configuration instructions are shown after adding a domain. There are two choices:
- CloudCannon DNS (recommended)
- External DNS
Verisign provides a guide to learn how DNS works.
CloudCannon DNS
To configure your domain with CloudCannon DNS:
- Ensure you are using CloudCannon DNS, otherwise click Use CloudCannon DNS
- Go to your domain registrar’s DNS Server Settings or Nameservers
- Enter the nameservers CloudCannon provides in Site Settings / Domain
- Save the changes
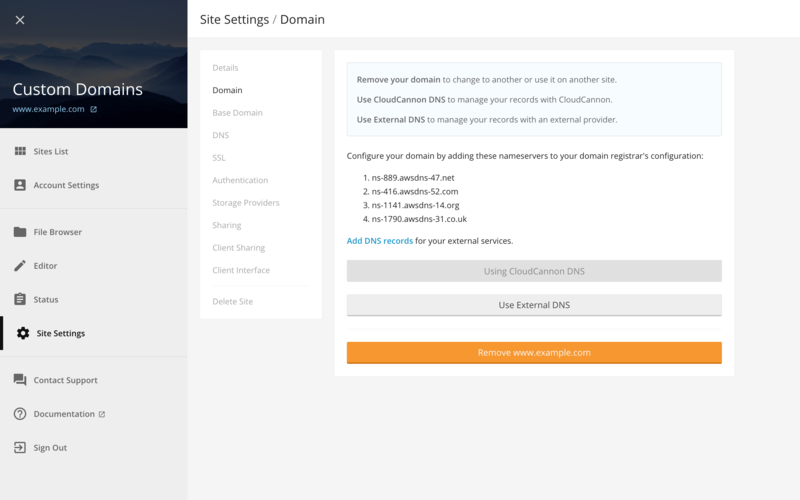
Set additional DNS records for external services or ownership validation with CloudCannon DNS.
External DNS
CloudCannon DNS is strongly recommended for sites on apex domains (no subdomain). External DNS relies on an A record mapped to a single server. This cannot be dynamically load balanced, reducing redundancy and increasing potential down time risk.
To configure your domain with External DNS:
- Ensure you are using External DNS, otherwise click Use External DNS
- Go into the DNS settings for your domain
- Add the CNAME and A records provided to your DNS records

The CNAME record maps your subdomains to CloudCannon servers, the A record maps your apex domain to a specific CloudCannon server.
Here is the DNS documentation from a few domain registrars:
- iwantmyname
- Namecheap (can be used with any domain registrar)
- GoDaddy